Monday, May 9, 2011

PERSONALIZED Notepads!

So remember these guys?  I wrote something about how you could dress it up or down however you like.  At the time, I couldn't really think of how a person might make it more interesting, short of using fancy scrapbook paper or something, but that takes a bit of the awesomeness out of the project, since you'd essentially be using new paper, rather than recycling or using up otherwise unusable paper.  

HOWEVER, I was trying to make some mother's day cards for our various moms around here, when I had a major brainwave.  

I printed out a few pics on my temperamental second-hand printer, and they were all pretty sub-par quality prints.  I wanted 3 copies of each, so when I printed them out, there were 3 pics down the left side of each page with about 6 inches of white space to the right.  Since so many of the pics were not really worthy of being put in a special mother's day card, I didn't know what to do with them all.  I think I had 5 pages in all.  


O ho!

All I did was cut the pages up between each picture, piled them all together, and sewed.  Voila!  A nice little writing pad for grandma with a cheeky boy on each page...  I wish I had come up with this before I sent the cards to the faraway grannies!  (I also wish that my printer was not so temperamental, or I would whip up a couple more and send them out!!)

Wednesday, May 4, 2011

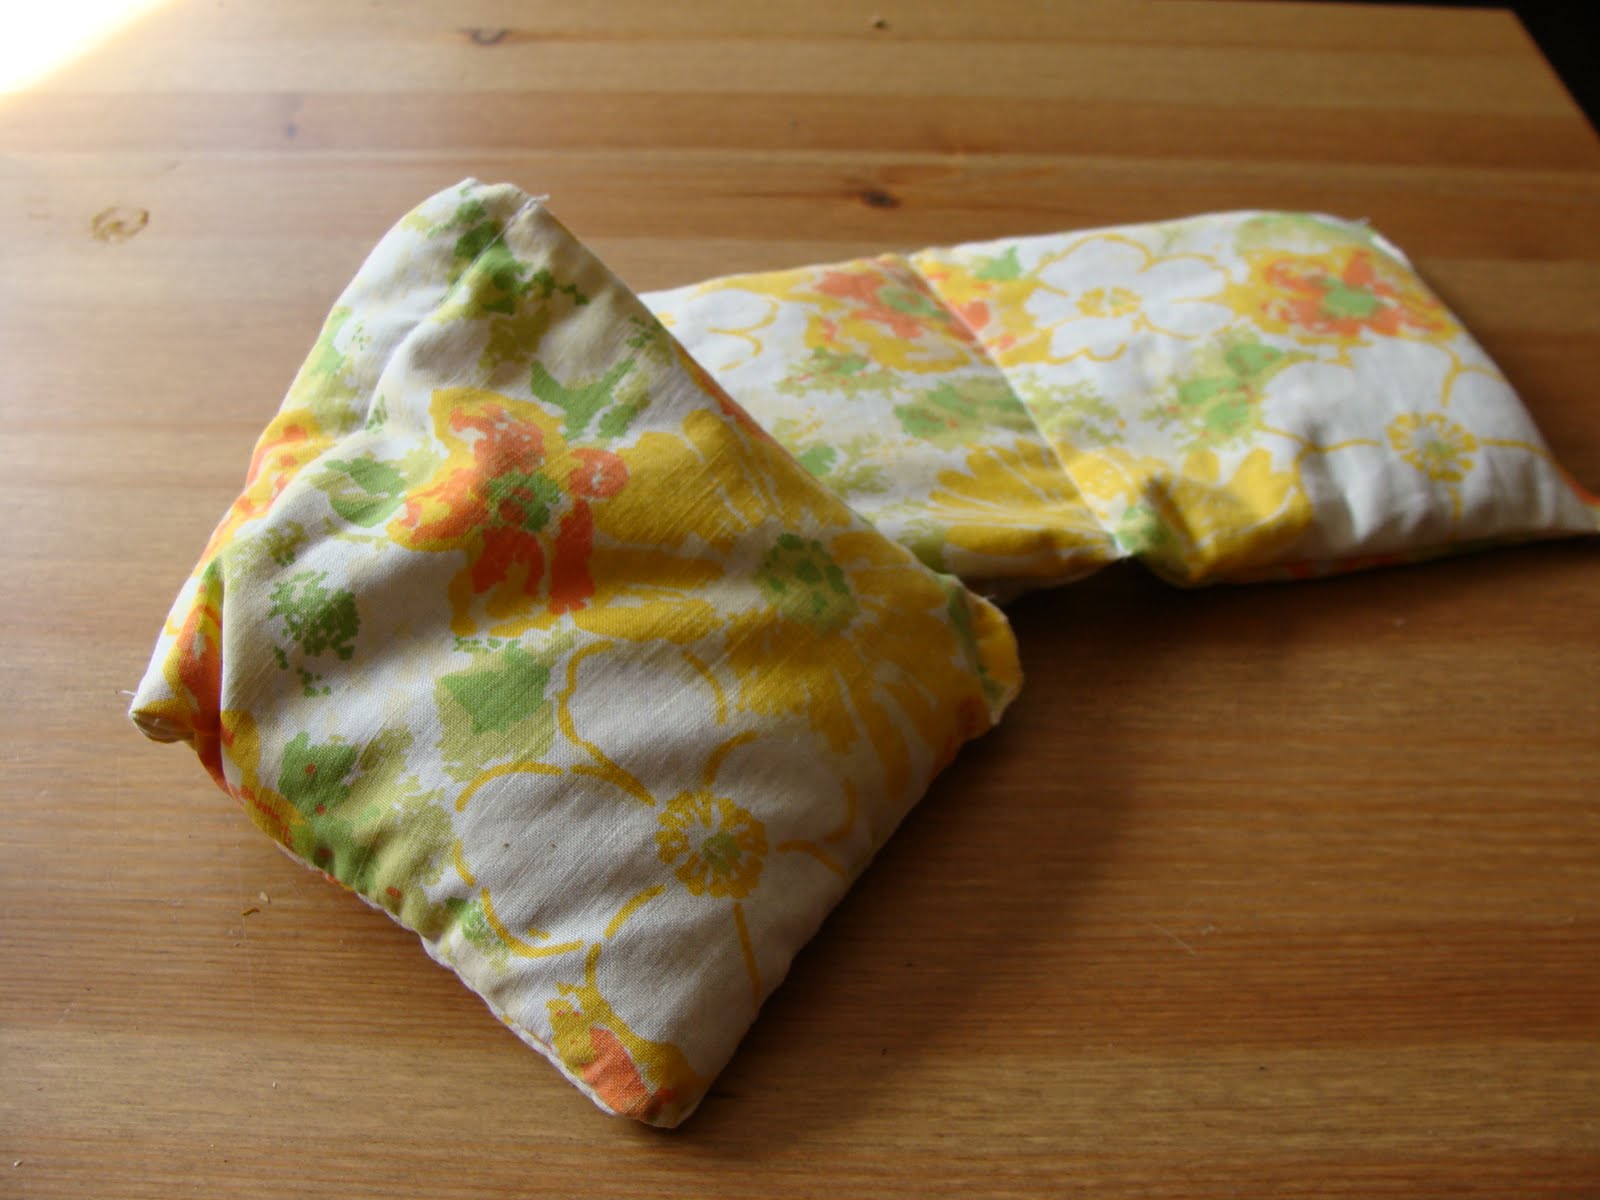
Week 18: Wheat Bag Rejuvenation

In my opinion, the best reason (and for a while it was the only reason) to have a microwave is to heat up a lovely wheat bag.  It's the beginning of May and I still use one (or two, or three) every night.  I love having a toasty warm bag of wheaty goodness at my toes as I drift off to slumber.  For a few years we didn't have a microwave, and I lamented the loss of my wheat bag every night.  Heating pad, hot water bottle... nothing else quite comes close.

With all that use, my wheat bags inevitably break down after a while.  I generally ask my MIL for a new one every Christmas, but even though I have 2 lovely new bags, I feel bad for the 2 sitting in my closet weeping little wheat tears.  Instead of chucking this guy out, or letting him languish, I decided to give him a little sprucing up!


This one's totally simple.  Take the wheat out of the ripped bag, make a new bag, and fill it with the old wheat.  I used the bottom of a vintage pillowcase I got at the thrift store, since I was feeling lazy and didn't want to sew too much!  

So here are the steps:

1) Cut fabric to your desired size.  I went slightly longer and skinnier for the new version.


2) Inside out, sew sides, leaving about a 4" opening to turn inside out.  I just left one whole short side.


3) Be sure to use small stitches and go over it twice just for security's sake.  You don't want wheat escaping all over the place when you use this bad boy.  I also serged to be safe.


4) Turn right side out and transplant wheat.


5) *optional step* Sew evenly spaced compartments so the wheat doesn't pool on one side of your bag.  (I only do this with long skinny ones, not squarish ones.)  It's best to do this as you fill it so you avoid sewing over wheat kernels.


6) Sew up the open side.  Twice.


Sunday, May 1, 2011

[Where I give you advice like I know what I'm talking about]

Seven small things that are easy to do and easy on your wallet.

1) (for those who menstruate) Use a menstrual cup.  No garbage, no plastic waste, no chemically treated cotton inside of you, nothing to remember to buy/have around each month except one discreet little cup!  This of course doesn't work for everyone, but for some people it can be a FANTASTIC solution.  It's a one time cost, but lasts for something like 10 years. 


2) Make your own salad dressing.  Some kind of oil, some kind of vinegar, some kind of sweetening, mustard.  Anything on top of that is icing on the cake!  Or spice in the dressing, as it were...

3)  Use vinegar for cleaning and disinfecting.

4) Water it down

5) If you eat meat, use less.  I'm not talking full on vegetarianism here (though that's cool if you want to), just cut it back a bit.  Say, halve the amount of meat you add into a recipe and double the veg.  Or take days off from meat.

6) Stop eating junk food.  Or cut it down.  Junk food is expensive and wasteful and never tastes as good as you want it to and makes you feel a bit icky afterward (or should I say, ME).  Of course, nothing beats a good burger, but at least find a GOOD burger.  Something that will be worth it to you.

7) Switch paper for cloth.  Bags, kleenex, towels, wipes, heck, some people even do it with toilet paper!  (A non-threatening way to do this is to just use cloth for #1...)

What other kinds of things do you do to save around the house?

Saturday, April 30, 2011

Week 17: Easy Peasy Wall Hangings

(April 28, 2011)


This here's a project I've been sitting on for quite some time, but just never had the oomph to do.  Or something.  I'm not exactly sure why I never did it because it is dead easy and I had all the materials, but there you are...

It's a very easy no-sew fabric project, it adds a nice touch to a bare wall, and is a temporary decorative piece for renters like us!  Also, I love the fact that you can use patterns that may have sentimental value to you.  My mom's always using bits of scrap that came from other memorable projects.  "This one was a maternity shirt, this one was your baby curtains, this was a work shirt of dad's..."  Of course, I am just starting out my lifelong fabric stash, so this was all new (to me from the thrift store).


Stuff you need:

- wood embroidery hoops of varying sizes
- fabrics about an inch wider than each hoop
- glue
- tacks
- fabric scissors

What you do:


1) Cut out the fabric to be about an inch wider all around one of your hoops.
2) Separate the inner from the outer hoop.
3) Lay the fabric over the inner hoop.  Push the outer hoop down over it to sandwich the fabric between, making sure that it "catches" all the way around.  Pull fabric taut.
4) Secure hoop by tightening the little screws.


5) Glue down excess fabric at the back.  I just used a little bit of glue stick to gently hold it down to the back of the wood, in the hopes that if I ever choose to change the fabric or even *gasp* embroider something, I might be able to get this fabric out.


6) Step back and admire your handiwork.


7) Arrange and hang on walls to your preference.  I just used one regular thumb tack per hoop.


PS - Sorry I've been away so long.  Just had a huge dry spell with no creative mojo and no motivation.  I've got a few more up my sleeve, so hopefully I'll be back in the swing of things from now on!

Sunday, April 10, 2011

Green Changes for the Bod

I couldn't figure out what to title this post.  To be truthful, I've been lacking in motivation for the past couple weeks in a major way, and I haven't had any really inspiring ideas for projects.  All of this adds up to a bit of a fall off the blog wagon.  And I was so gung ho for the first while!!

Anyway, I've been thinking of all the changes around the house that I've been doing since I started the blog and I thought I'd enumerate for you the "personal care" changes I've made in an effort to be rid of nasty chemicals and additives, as well as to save some moolah.  Thanks to those friends who were able to help me with these changes and gave me great advice!

HAIR

- No 'poo.  You can read about the process here.  I've found that it works pretty well for me, though it seems as though my hair is developing a bit of an unruly wave that I'm not crazy about.  If it was already slightly curly I don't think I'd mind, but going from definitely straight to neither-straight-nor-curly is kind of annoying
- I never really did use much in the way of styling products anyway, so this hasn't changed.  Still using the straightener (darn wave!) and blow dryer at times
- Tried threading my own eyebrows to varying success.  It's pretty hard.  I broke down and went to a salon for this.  Now I'll try to keep it up as long as possible on my own with plucking.
- Sugar wax.  I love this, but it's hard to get the cooking time right.  I keep overcooking mine and it turns into this great huge candy brick and doesn't work right.

DEODORANT

- I made this deodorant and am definitely satisfied!
- I started to use a Norwex cloth to clean the pits if they get a bit stinky.  Then I use deodorant and I'm good!

FACE

- Also using Norwex cloth for my face (a separate one!!), washing with just plain water
- I have been moisturizing my face with either sweet almond oil or grapeseed oil.  This is nice and light and won't clog pores
- Tea tree oil to disinfect, or spot treat any blemishes
- I got some 1% BHA gel from Paula's Choice on the recommendation of my favourite cosmetics advice lady.  This exfoliates and smoothes the skin.  I'll let you know how it works in a couple weeks!
- Mostly using the same makeup.  Just a bit of concealer for spots, and powder mineral makeup for light coverage.

BODY
- Dry brushing!  I've been doing this for about a month or more and have really noticed a difference in how smooth my skin feels.  Apparently it also has loads of other benefits that I'm currently too lazy to look up for you.
- Natural soaps.  My brother's girlfriend made a bunch of soaps as a gift for us this year, and when those run out I think we'll continue to use either Dr. Bronner's or Val's Veggie Bar.  Or we might just beg her to make some more for us...
- Also using sweet almond oil to moisturize my whole bod!  This feels totally luxurious.  Though, I must admit, I still use regular commercial body butter to moisturize my feet at night.  Sometimes the oil just doesn't cut it!

HANDS
- Oils for regular moisturizing.  Olive, coconut, sweet almond.
- Lanolin for extreme moisturizing.  This is pretty sticky though, so I only use it if I have time to just let it sink in for a while.
- Sugar/glycerin hand scrub.  I just do this occasionally, but it's wonderful, and so easy!
- Nail buffer.  This isn't something I would normally be interested in, but I've been working at this fancyish restaurant and I feel pretty self conscious about my drab hands.  For a while I was occasionally painting my fingernails but A) it's not really me B) the polish is loaded with chemicals and C) it's not pretty if you can't keep it up.  Oh, and D) who has the time to wait for fingernail polish to dry???  This nail buffer is fabulous.  You just have to buff your nails with the rough side and then the smooth side.  They get really shiny and smooth just as if they were painted with clear polish and it's quick and easy and chemical free.

TEETH
- I was brushing with a natural toothpaste that wasn't too bad, but it wasn't that good either, and it was pretty expensive.  Then I tried using baking soda for a while, but that takes some getting used to.  It's really salty!  And sometimes I miss that minty fresh feeling of toothpaste.  Who decided that minty = fresh anyway?
I might try to find some peppermint essential oil to add to the baking soda mix and see if that solves my toothpaste problem.  Til then, I'm using colgate.

I hope this post was able to make up for the lag lately.  I'm trying to get more jazzed about projects again.  I think maybe if I go to bed earlier it'll help, which means this post is over!

Monday, March 21, 2011

Week 12: Chair Re-Upholstery

(March 20, 2011)

This is what our "computer chair" looked like 2 days ago:


Gross, right? I didn't mind so much the cheesy gingham/sunflower motif, but when it started peeling back and revealing the older incarnation of the chair, and WORSE, the old stuffing...  I had to do something.  Especially since Charlie has been running around with little bits of the ancient fluff and playing with it.  Gives me a shudder every time I think about what exactly might be contained in that chair fluff.  And I'm not a germ-afraid kind of person!  I let Charlie eat food that's been on the floor for goodness sake!! (On occasion.  Don't judge!  I feel like it must be good for his immune system...)

I thought it might be kind of cool if I just got rid of the upholstery and just left it bare, since the wood style seat looked to be kind of nice, but the edges were very sharp and unfinished. 

I had a bit of vinyl left over from another (still as yet unfinished) project, so I figured it couldn't be that hard to recover it myself.  Anytime you look at re-upholstery on youtube, it looks amazingly easy.  And it turns out it is!  Kind of...

Here's what you need:

screwdriver
staplegun
staples
fabric to cover with (something sturdy)
something to stuff with (I used 4 layers of quilt bat, but it's probably better to use something like foam)
chair (like, duh)

First, disassemble the chair.  For this particular chair, both the back piece and seat piece came off.


You might need a screwdriver assistant.


Next, take off the old covering.  This was gross.  There was a weird, decades old perfumey smell coming from the chair as I ripped away the layers that was making me nervous so I opened a window and advised Charlie to stay away.

Once you have a clean starting surface, cut out your filling and cover.  Cut about an inch around the outside of your seat for the filling, and an inch or two more than that for the cover. 


Start stapling!  When you do this, to ensure even tension all the way around, do it in sort of a star pattern.  Start in the middle of one side, then do the middle of the opposite side, pulling taut.  Do a staple on each side and keep doing this until you get close to the corners.  Then do the same kind of thing with each corner - start in the middle of the corner and work outwards.  As you can see, it doesn't have to be perfect on the bottom, but you want the top to be fairly smooth.


Repeat for any upholstered parts of the chair, then reassemble!


Since the back part of the chair will be showing, I also cut out a piece of vinyl  a little bigger than the back, folded over the edges, and used that to cover up the messy edges.  These staples you want to make sure are tidy and evenly spaced. 


One more note:  It's probably a good idea to somehow mark where the screws go for the legs.  I found it a bit tricky getting them into the right spots, because I can be a bit hasty when starting a new project.  Other than that, easy peasy!

Wednesday, March 16, 2011

Week 11: Granola

(March 15, 2011)

I picked up lots of seeds so I can make many more batches!  Woohoo!
Due to my growing yogurt craze, I've decided this week to make granola.  Sure you can put fruit and other cereals in your yogurt, but nothing quite stands up to it as well as granola.  By the bottom of the bowl, the Raisin Bran is soggy and the Special K has mysteriously disintegrated.

I found this recipe from www.soulemama.com and the little bits of granola looked so delicious, just exactly what I want in a granola:  crunchy, sweet, with big chunks of delectable awesomeness.  I love it when granola has big chunks!  Apparently the recipe is from a book called Feeding the Whole Family: Cooking With Whole Foods by Cynthia Lair.  You can go to the soulemama link for the recipe or buy the book. 

I doubled the recipe and it made a LOT.  We now store it in the cookie jar (AKA the biggest jar in the kitchen)

For some reason, I thought making granola would be time consuming and/or expensive.  Nope!  Just mix the dry and wet ingredients separately, then combine all together, spread on a baking tray and bake.  Turn several times throughout baking so that it all gets evenly crunchy.  And it wasn't expensive either.  The only possibly expensive items were things that we already had on hand: almonds, coconut oil, and brown rice syrup.  I didn't want to use up all the brown rice syrup, so I supplemented half with maple syrup. 

To make it even cheaper, you could substitute many of the ingredients.  Peanuts instead of almonds, any other kind of oil instead of coconut, and any other liquid syrup instead of brown rice or maple.  Honey would definitely work! And you can add in many other kinds of good things too.  Dave's mom suggested flax and I wish I had thought of it before!

This granola is delicious.  I've been giving it to Charlie as a little snack and he loves it.  Yum yum crunch!