Showing posts with label bread. Show all posts

Monday, February 21, 2011

Thursday, February 10, 2011

Made It: Breadcrumbs

I'm about to start a string of posts of things that are totally simple to make yourself.  So simple, in fact, that I almost feel silly posting about it.  Because they're that obvious.  Honestly, I don't think you are a moron.  I just thought I would share these awesome ideas with you!

Today's Made It is a total no-brainer.  We eat homemade bread here, which means that we slice it ourselves.  For some reason that is eluding me at the moment, the bread heels often don't get eaten.  They stay in the bread box until they get crusty and moldy and then we throw them out.  Stupid, right?  Until a little while ago, when Dave started collecting all of our unloved bread heels in a bag in the freezer.  Find a bread end?  Add it to the bag!  Until we had a decent sized bag full of various types of crusts.  (How many different words can I use for the same thing?)

Yesterday I wanted to make some oven fried chicken and needed breadcrumbs.  Project time!


I won't sport with your intelligence by telling you how to make breadcrumbs, but I will say that I recommend toasting them a bit.  Even after being in the freezer for several weeks (or months) the bread still held quite a bit of moisture.  After putting the pieces in the blender I toasted them in the oven for a while until they didn't have steam escaping them when I stirred them up.  That way I know they won't get soggy in their jar in the fridge!


This is just one of many small things you can do and make yourself around the house to save a few dollars.  An added bonus of this one is that I know exactly where everything came from.  It's like following the life cycle of my bread!  Hello little crumbs!  Thank you, you were delicious...

Tuesday, January 25, 2011

Made It: Brown Bread

In my quest for a doable bread recipe, I decided to try our old standby, the bread Dave used to make when he started baking bread.  I'm not really sure what kind of bread this is, since his ingredient list changes every time he makes it, depending on whims and what we have on hand.  This time, I added:

2 cups warm water
2 cups warm milk
2 t. yeast
3 t. brown sugar
2 t. molasses
1 egg

Into our giant bread bowl (this bowl was big enough to bathe Charlie, our massive baby).  Stir together with giant wooden spoon.  Add 6 - 8 cups flour, substituting in whatever else you want.  I added oats, ground flax, and rye flour.  I'm afraid the flour measurement is totally a guesstimate because I lost count and we were both adding things at the same time.  Basically, add flour (or the like) until it has the right sticky "ball" consistency.  And do not forget to add the 2 tsp salt when you add the flour!

After mixing it all together I let it sit covered in a warm spot for about half an hour to autolyze. Hmm.  I just checked around and apparently, the autolyze will work better if you add the salt after.  It serves to kind of soften up the dough by hydrating the flour.  At any rate, leave the dough to rest before you start kneading.

I think because this bread had so much extra stuff and rye flour in it (in addition to all purpose), I ended up having to knead it for a VERY long time. 


Once you figure you've kneaded enough - maybe if you stretch out a piece of dough and it doesn't break off, but rather stretches - put your big ball of dough back into your now clean giant bread bowl that has been oiled.  Rub some oil over the dough as well and put it covered in a warm place to rise.  Once the dough has doubled in size, punch down and divide into portions to put in oiled bread pans.  Allow to rise just over the top of the pans and bake for 25-35 minutes at 350. 

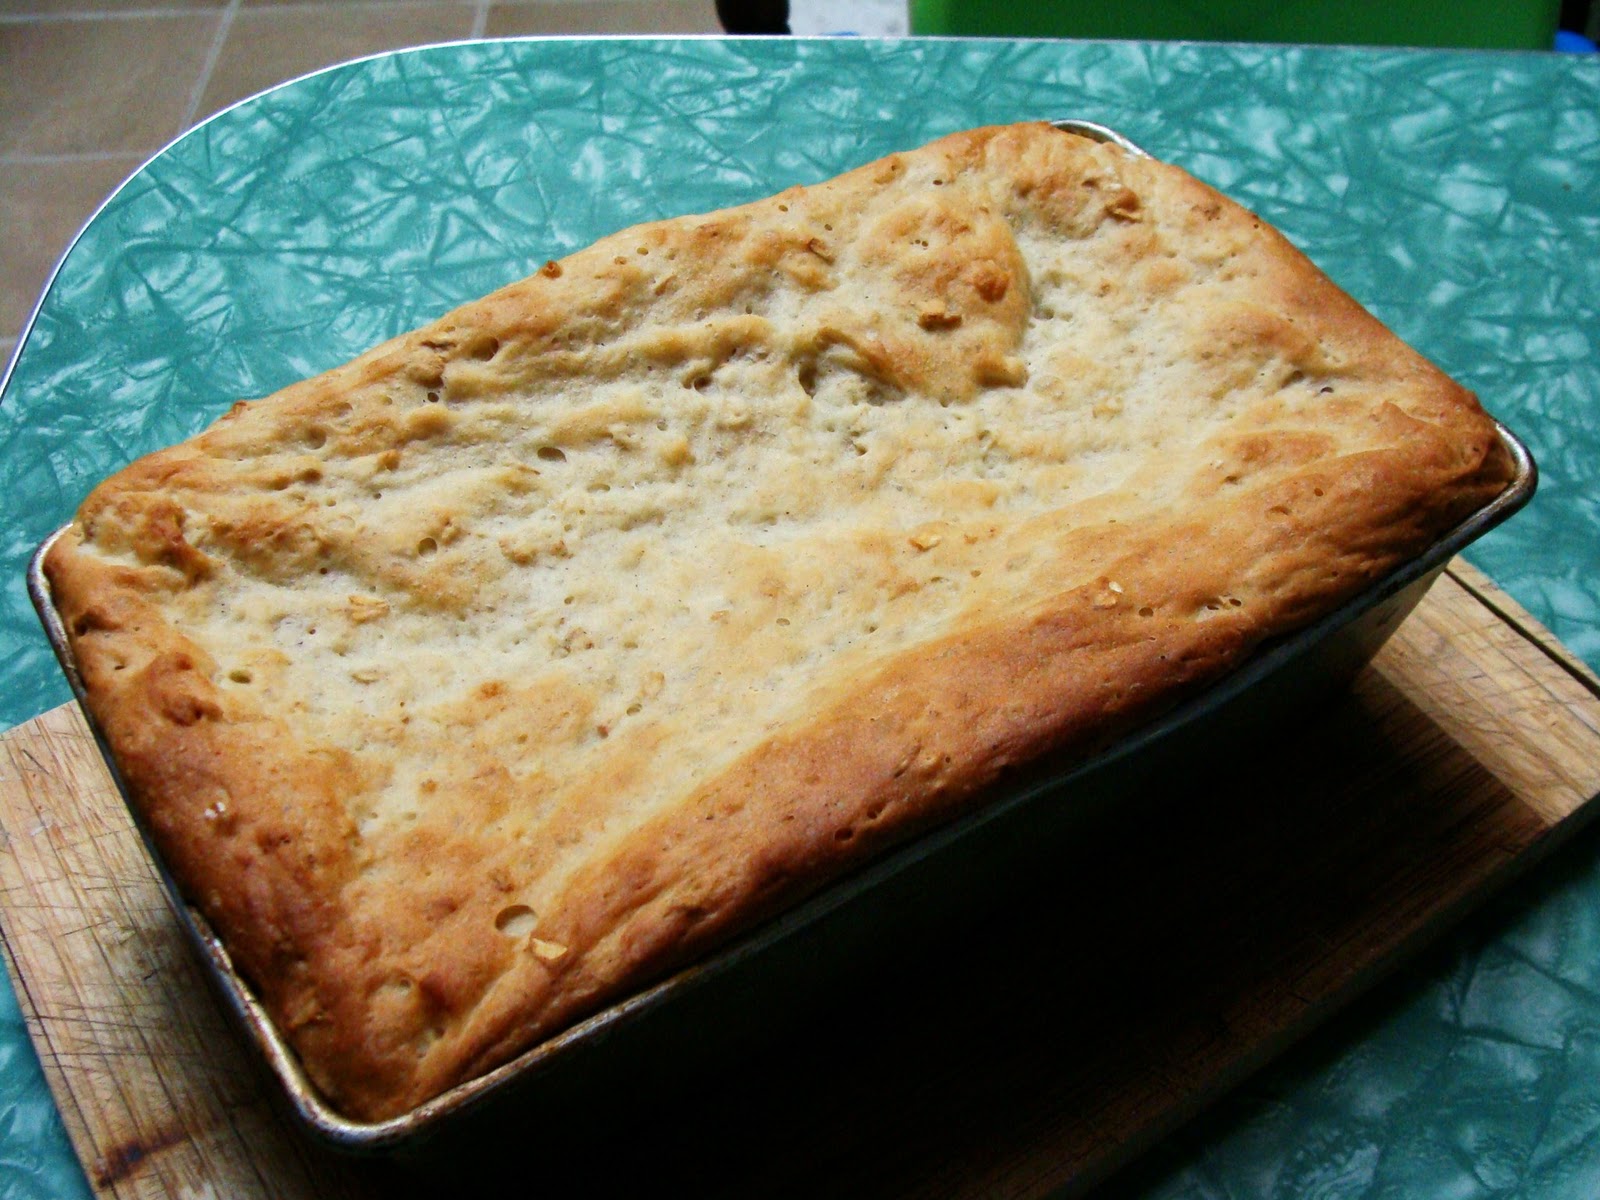
What happened with my bread: I punched it down twice because Dave was sick and napping and I wasn't sure what to do.  This is okay though!  I think you can punch it down numerous times and still be okay.  It might even be better! (?)  Also, I let the bread rise for too long in the pans, so then when I baked it, they sort of fell.  Later, when Dave was feeling better, he let me know that we could have punched them down in their pans to remedy this.  Ah well...  the bread came out very nice indeed - a lovely daily bread type of bread.  Good for toast, good for sandwiches, good for snack.


One more thing for the people who tend to NOT follow recipe instructions (like me):  Cooling on a cooling rack is really a good idea.  I just flipped my loaves out onto a baking tray and kind of left them there upside down and they got sort of weird marks from the humidity from the pan.  So use a cooling rack. 

Saturday, January 22, 2011

Made It: Ciabatta Bread

This is probably my favourite bread to eat.  It's nearly perfect - chewy, great crumb, wonderful texture, crispy crust, nice flavour.  It also, as it happens, is quite easy to make for a novice bread maker like myself.  In order to get that wonderful chewy texture, you have to work with a very wet dough, which does not lend itself to kneading, so this is a kitchenaid bread. 

Biga
1 1/2 cups flour
pinch yeast
3/4 cup warm water

Dough
3 cups flour
1/2 t. yeast
1 t. salt
1 1/2 cups warm water
Biga

Start the night before with the Biga, which is like a sourdough starter.  Mix yeast & warm water together in a medium bowl, then add flour.  Combine, then cover with saran and leave out over night.

Next morning, mix up the rest.  Start with warm water in the mixer bowl, add yeast, stir, then add the biga.  After that is combined gently, add the flour and salt.  **if you forget the salt the bread will taste bad!
Gently mix to combine the ingredients.  Once combined, cover with saran and let autolyze for 30 minutes.

Mix again on low setting (1 or 2) for 30-45 seconds.  Cover with saran and leave in a warm place until doubled in size.  (For me this takes several hours)

Turn dough out onto a floured surface and dust top with flour.  This is the "kneading" part, only you don't knead.  Imagining the dough as a shape having 4 sides, stretch out each side and pile it on top.  Let sit under a giant bread bowl with a warm cup of water to keep it moist and warm.  Repeat every 20 minutes or so for 4-5 times. 


Divide your dough.  I do it in half and it makes 2 decent sized loaves.  Stretch each piece as you did before, cover and rise 30 minutes.


Place on a parchment lined baking sheet, shaping as necessary.  Bake at 360 for 20-25 minutes until bread is a nice caramel colour and has a good crust. 

I don't have any "after" shots of this bread since I took one loaf to a friend's for dinner RIGHT as it came out of the oven, and then we ate the other loaf as sandwiches today.  I do however have this older pic:


The 2 top left loaves are Dave's "regular bread" recipe, which is what I made today!  However, mine turned out slightly differently because a) of Dave's erratic and changeable use of ingredients and b) I let them rise too long in the loaf pans and they fell a bit when they baked :(   But the other 4 are the ciabatta.  Don't they look delicious??  Yum!  So delicious with a swipe of butter and some honey.

Friday, January 21, 2011

Made It: WHO bread

In our need and greed for toast around here, I think I could probably make bread every day and not have to freeze any of it.  I've already had 4 pieces of toast today...  But that might be because I made some delicious bread yesterday!  It's just so - eatable!  It's soft and chewy and sweet and ever so lightly flavoured with honey and a touch of cinnamon.  Delicious! 


 I decided to try Soulemama's WHO bread (I think the "WHO" stands for wheat-honey-oat, rather than World Health Organization) and was pleasantly surprised.  The recipe is super easy and quick and does not call for very much kneading.  It also tastes so much better than it looks!  However, Dave has since pointed out to me that the bread should have been kneaded longer.  Apparently it has something wrong with it called an "M-fault," which is when the top of the bread is higher at the sides than in the middle, creating an "M" shape, which you can kind of see here.  It has something to do with the bread dough not having enough strength to stick together. 

This also means that the bread, while delicious toasted with jam, does not have the strength for something like a sandwich.  I could see it crumbling under the pressure of holding together some lettuce and cheese...

All of this has just reminded me that I need to get cracking on today's bread recipe, which is more of Dave's ciabatta.  No kneading in that recipe either, just a lot of stretching.  And waiting.  I'll try to make a post on how that one turns out as well, just to compare.

Thursday, January 20, 2011

Goals for Frugally Living Well

One of the things I'm learning through financial restriction is how much of a privilege good food is.  By "good food" I mean food that is fresh, wholesome, and unprocessed.  For a low income family, it is next to impossible to buy locally grown meat, artisan bread, locally roasted coffee, and farmers' market veggies.  These are the things we are used to, but in these reduced circumstances, they're simply out of our reach.  Of course I'd rather buy an organic free range chicken...  Heck, even that "free from" packet of chicken thighs is looking good these days.  But at over $2/kg more than the regular chicken thighs, it's a tough sell.

I suppose financial restriction really just forces you to choose which is more important to you.  If I was stricter with myself, perhaps I would purchase that free range chicken instead, and only have chicken every other week.

At any rate, one of our big purchases used to be our bread selection.  We are a major toast family, and plain old grocery store bread just ain't gonna cut it.  (I can't decide if that's a pun or not...)  As it turns out, making your own bread is much tastier AND more cost effective than buying the grocery store bread.  Here is my list of things that I hope will help us to live within our budget AND live well:

1) Use everything you have.  This means not letting anything go bad in the fridge, and no daily shopping trips!

2) Bake your own bread

3) Make as much as you can yourself.  Future projects include mustard, salad dressing, ketchup, lotion, sunscreen, conditioner, soap, body butter, etc. This helps you to avoid weird ingredients and hopefully will also benefit the grocery bill.  (Though some of the projects have a bit of a start-up cost for materials)


4) If you can't fit anything in your closet (dresser, piles on the bedroom floor, etc.) you don't need any more clothes.

5) Decide what you can and can't live without.  One of the things that we don't cave on is peanut butter.  Yet.  But ordinary supermarket coffee will do for now.  Besides, they don't have Transcend here. 


That's it for now.  I'll probably add to this list as I learn more about our limits and limitations!

Made It: Fast Bread

So, along with our plans for careful budgeting and using every bit of what we have, we've also started to eat a bit less meat around here.  Don't get me wrong, we're pretty strong meatatarians, I just figure we don't have to eat meat at every single meal.  Or maybe the meat can be more on the sidelines, rather than the main event.  We just don't need all that meat protein, and meat can be pretty pricey. 

Following this, I decided to make soup from our homemade chicken stock from the weekend's chicken dinner.  What's in the fridge?  Carrots.  Lots of carrots.  And half a yam.  I found a recipe in my soup cookbook for a curried carrot apple soup, and figured that the yam could be snuck (sneaked?) in there without too many heads turning. 

But what takes a simple creamy soup from decent to Amazing Meal is the FRESH BAKED BREAD you serve it with!!  Generally Dave is the bread baker around here, and I have only recently begun my bread journey with his excellent ciabatta recipe.  But that's like a full day recipe - 2 days if you start the starter the night before.  And I am habitually a late starter at stuff.  It's already 3pm and I don't know what we're eating tonight... 

The point of all this is, I needed a recipe for fast bread.  Something you can put together while currying the carrots for the soup and playing outside with Charlie.  This recipe definitely fit the bill.  Almost perfect for the novice bread baker as well, as it didn't really require too much kneading or special skill. 


*I will admit, however, that as I was finishing up the bread to bake, Dave came home and helped me make it look beautiful like this.  Apparently the technique is called "rounding" - don't just bake the loaf the way they tell you to do it.  Tuck the ends under and kind of round it out, sort of rolling it like a ball sideways.  Then, just before you bake, make the cuts in the top. Beauteous!

We served up the bread alongside our curried soup with some sliced tomatoes, a few little bocconcini bites, and some liver pate to make it interesting.  All in all, a lovely meal!