Well, I'm afraid I haven't posted here in about 3 months. In that time I have:
- Interviewed for a job
- Got the job (teaching full time - yay!)
- Discovered I was pregnant with baby #2
- Worked until I couldn't sleep at above job
- Enrolled my son in daycare
- Un-enrolled my son from daycare to stay home with papa
- Missed my boys terribly
What I have NOT done:
- any making of any kind.
Actually, that's not true. We're trying to make most of our Christmas presents for family this year, so I have made a huge batch of mustard, some of my brother's infused salts, various chocolate barks, and an absolutely delicious batch of almond roca. Hopefully more to come today. And seeing as today is the first day of Christmas holidays for me, I wanted to jump back into it!!
Here's what I made today:
Nursing pads!!
Cost: $0
(just cut up a receiving blanket I barely used with baby #1. This kid was so big, none of the commercial ones were any good to me, since he wasn't a spitter and I couldn't swaddle him in these. Had to get my mom to make special big ones!)
What I did:
1) Fold blanket in half. Trace out 8 circles ( really 16 because of the fold) using a 4-5 inch bowl as a guide. Cut out.
2) Fold in half and sew a little dart in each one (from the center to one edge, about 15 mm at the widest point of the dart). Cut off excess material from dart.
3) Layer 4 circles together, wrong sides facing in, and serge around the outside.
4) That's it!
This project seriously took me half an hour to complete and now I have 2 sets of nursing pads that I made from something I wouldn't have used anyway!! I still have lots of fabric left in that first receiving blanket, so I'll probably make more, but I figured I should ease myself back into the whole crafting/making thing. Wouldn't want to overdo it... And besides, there are episodes of Glee to be caught up on ;)
Showing posts with label free. Show all posts
Showing posts with label free. Show all posts
Saturday, December 17, 2011

Monday, May 9, 2011
PERSONALIZED Notepads!
So remember these guys? I wrote something about how you could dress it up or down however you like. At the time, I couldn't really think of how a person might make it more interesting, short of using fancy scrapbook paper or something, but that takes a bit of the awesomeness out of the project, since you'd essentially be using new paper, rather than recycling or using up otherwise unusable paper.
HOWEVER, I was trying to make some mother's day cards for our various moms around here, when I had a major brainwave.
I printed out a few pics on my temperamental second-hand printer, and they were all pretty sub-par quality prints. I wanted 3 copies of each, so when I printed them out, there were 3 pics down the left side of each page with about 6 inches of white space to the right. Since so many of the pics were not really worthy of being put in a special mother's day card, I didn't know what to do with them all. I think I had 5 pages in all.

O ho!
All I did was cut the pages up between each picture, piled them all together, and sewed. Voila! A nice little writing pad for grandma with a cheeky boy on each page... I wish I had come up with this before I sent the cards to the faraway grannies! (I also wish that my printer was not so temperamental, or I would whip up a couple more and send them out!!)
Wednesday, May 4, 2011
Week 18: Wheat Bag Rejuvenation
In my opinion, the best reason (and for a while it was the only reason) to have a microwave is to heat up a lovely wheat bag. It's the beginning of May and I still use one (or two, or three) every night. I love having a toasty warm bag of wheaty goodness at my toes as I drift off to slumber. For a few years we didn't have a microwave, and I lamented the loss of my wheat bag every night. Heating pad, hot water bottle... nothing else quite comes close.
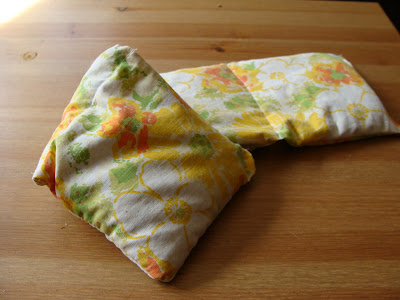
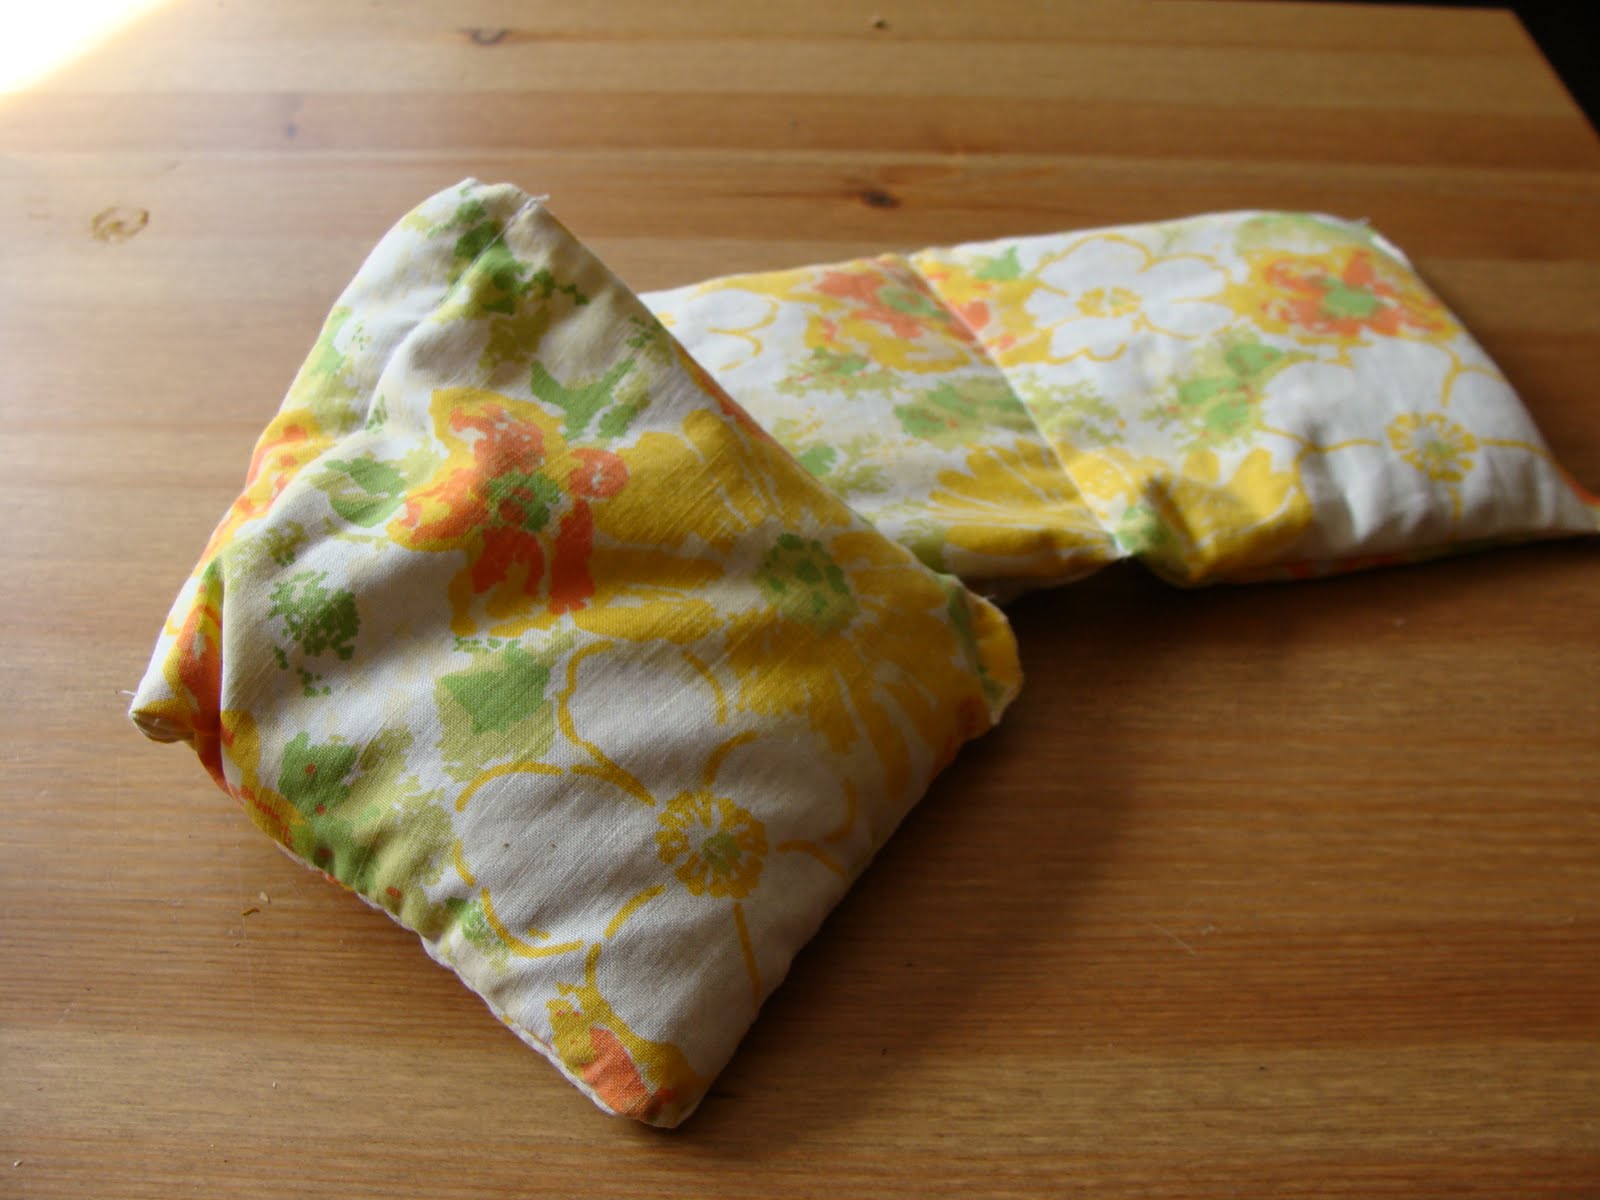
With all that use, my wheat bags inevitably break down after a while. I generally ask my MIL for a new one every Christmas, but even though I have 2 lovely new bags, I feel bad for the 2 sitting in my closet weeping little wheat tears. Instead of chucking this guy out, or letting him languish, I decided to give him a little sprucing up!


2) Inside out, sew sides, leaving about a 4" opening to turn inside out. I just left one whole short side.

3) Be sure to use small stitches and go over it twice just for security's sake. You don't want wheat escaping all over the place when you use this bad boy. I also serged to be safe.


4) Turn right side out and transplant wheat.

5) *optional step* Sew evenly spaced compartments so the wheat doesn't pool on one side of your bag. (I only do this with long skinny ones, not squarish ones.) It's best to do this as you fill it so you avoid sewing over wheat kernels.

6) Sew up the open side. Twice.
With all that use, my wheat bags inevitably break down after a while. I generally ask my MIL for a new one every Christmas, but even though I have 2 lovely new bags, I feel bad for the 2 sitting in my closet weeping little wheat tears. Instead of chucking this guy out, or letting him languish, I decided to give him a little sprucing up!

This one's totally simple. Take the wheat out of the ripped bag, make a new bag, and fill it with the old wheat. I used the bottom of a vintage pillowcase I got at the thrift store, since I was feeling lazy and didn't want to sew too much!
So here are the steps:
1) Cut fabric to your desired size. I went slightly longer and skinnier for the new version.

2) Inside out, sew sides, leaving about a 4" opening to turn inside out. I just left one whole short side.

3) Be sure to use small stitches and go over it twice just for security's sake. You don't want wheat escaping all over the place when you use this bad boy. I also serged to be safe.


4) Turn right side out and transplant wheat.

5) *optional step* Sew evenly spaced compartments so the wheat doesn't pool on one side of your bag. (I only do this with long skinny ones, not squarish ones.) It's best to do this as you fill it so you avoid sewing over wheat kernels.

6) Sew up the open side. Twice.
Monday, March 7, 2011
Week 10: Yogurt
(March 6, 2011)

In an offhand comment, my mom recently asked me if I wanted her to bring anything for her weekend visit. I couldn't think of anything, but she came up with the brilliant suggestion of her yogurt maker! When I was little the only yogurt we ever had was homemade, usually with a dollop of homemade jam stirred in to make it sweet and fruity. (Could this be where the "I could probably make that" spirit comes from?)
However, her yogurt craze ended sometime around the junior high mark for me, and I just assumed the old yogurt setup had been sold in the community garage sale or something. Not so! Just squirreled away in the (very full) closets of the basement!
She even managed to find all of the little jars that go with it, so I could potentially make yogurt almost every other day - not that we'll be able to use that much yogurt...
How to make homemade yogurt:
1 liter of milk (I used homo)
1/3 - 1/2 cup skim milk powder
some plain yogurt with live bacterial cultures (enough for a tablespoon in each jar
thermometer
1. Clean and sanitize jars. I sanitized mine by pouring boiling water in there and leaving it for about 5 minutes.

2. Heat milk to 185 F. Once the milk is warm, you can add the milk powder. This helps to bump up the protein content, as well as thicken the yogurt. I read that if you keep your milk at 185 for half an hour it will also help thicken your yogurt. I love thick yogurt. Make sure that the powder is all dissolved, or you'll get lumps. (the warmth of the milk will help to dissolve it)

3. Cool milk to 110 F. I put a bunch of cold water in the sink and put my pot in there to speed up the process.

4. While your milk is cooling, put about a tablespoon of yogurt into each container you'll be using. Then once the milk reaches 110, pour it in while stirring to incorporate the yogurt throughout.

5. Place lids over containers and carefully set them in yogurt maker. Be sure that this is in a space you don't mind giving up for the next 6-8 hours, because apparently the yogurt doesn't like to be disturbed.

6. Go over to grandma's for dinner, come home, watch a movie, go to bed late. Next morning, your yogurt is made! Put in the coldest part of your fridge - the back.
NOTES:
- If you want to use your own yogurt for the starter on the next batch, do so within a week
- It only takes 6-8 hours, and apparently the longer you leave it, the thicker and more tart it will be
- This yogurt maker is indeed "thriftee"... my mom bought it over 20 years ago second hand, and it has been shared among the neighbours. And it works like a hot damn!
- My batch turned out slightly lumpy. I'm not sure why this happened, but I'm going to see if I can find a solution to this little issue.
*** You don't NEED any special equipment to make yogurt. I've seen recipes where people use a thermos, a cooler with jugs of hot water, a heating pad, or a warming oven. The key is that the milk is kept at a nice warm temperature and not disturbed for several hours.
As a bonus, with all this yogurt hanging around you can use it for lots of different things! My skin has been feeling crazy dry lately, so last night I whipped up a nice yogurt-cucumber-honey face mask. Home spa time!

In an offhand comment, my mom recently asked me if I wanted her to bring anything for her weekend visit. I couldn't think of anything, but she came up with the brilliant suggestion of her yogurt maker! When I was little the only yogurt we ever had was homemade, usually with a dollop of homemade jam stirred in to make it sweet and fruity. (Could this be where the "I could probably make that" spirit comes from?)
However, her yogurt craze ended sometime around the junior high mark for me, and I just assumed the old yogurt setup had been sold in the community garage sale or something. Not so! Just squirreled away in the (very full) closets of the basement!
She even managed to find all of the little jars that go with it, so I could potentially make yogurt almost every other day - not that we'll be able to use that much yogurt...
How to make homemade yogurt:
1 liter of milk (I used homo)
1/3 - 1/2 cup skim milk powder
some plain yogurt with live bacterial cultures (enough for a tablespoon in each jar
thermometer
1. Clean and sanitize jars. I sanitized mine by pouring boiling water in there and leaving it for about 5 minutes.

2. Heat milk to 185 F. Once the milk is warm, you can add the milk powder. This helps to bump up the protein content, as well as thicken the yogurt. I read that if you keep your milk at 185 for half an hour it will also help thicken your yogurt. I love thick yogurt. Make sure that the powder is all dissolved, or you'll get lumps. (the warmth of the milk will help to dissolve it)

3. Cool milk to 110 F. I put a bunch of cold water in the sink and put my pot in there to speed up the process.

4. While your milk is cooling, put about a tablespoon of yogurt into each container you'll be using. Then once the milk reaches 110, pour it in while stirring to incorporate the yogurt throughout.

5. Place lids over containers and carefully set them in yogurt maker. Be sure that this is in a space you don't mind giving up for the next 6-8 hours, because apparently the yogurt doesn't like to be disturbed.

6. Go over to grandma's for dinner, come home, watch a movie, go to bed late. Next morning, your yogurt is made! Put in the coldest part of your fridge - the back.
NOTES:
- If you want to use your own yogurt for the starter on the next batch, do so within a week
- It only takes 6-8 hours, and apparently the longer you leave it, the thicker and more tart it will be
- This yogurt maker is indeed "thriftee"... my mom bought it over 20 years ago second hand, and it has been shared among the neighbours. And it works like a hot damn!
- My batch turned out slightly lumpy. I'm not sure why this happened, but I'm going to see if I can find a solution to this little issue.
*** You don't NEED any special equipment to make yogurt. I've seen recipes where people use a thermos, a cooler with jugs of hot water, a heating pad, or a warming oven. The key is that the milk is kept at a nice warm temperature and not disturbed for several hours.
As a bonus, with all this yogurt hanging around you can use it for lots of different things! My skin has been feeling crazy dry lately, so last night I whipped up a nice yogurt-cucumber-honey face mask. Home spa time!
Thursday, February 10, 2011
Made It: Notepad
Make it yourself!

Last week I found myself with a stack of one-sided pieces of paper to put in the recycling after going through our gigantic and neglected mail pile. I also had been lamenting my lack of organization to keep up with my list habit. I love making lists for stuff (to-do, groceries, projects, whatever...) and I like to use scrap paper for them, but often my little scraps get lost in the vortex of our computer desk. I have in the past tried stapling scraps together, which is always slightly dissatisfying when you want to tear off a piece, and a paper clip might as well not even be there. But I do have a sewing machine...

These are ridiculously easy to make, and another total no-brainer, but I LOVE them. I love making my lists on them, I love tearing the pages off, I love knowing where my lists are now... They're great.
Just cut your scrap pages into the size note pad you want (I cut in 3 sideways, where the folds would be to put it in an envelope). I'm also pretty lax about the size of each page. You can be as tidy or untidy as you want. Then, using a wide straight stitch on my sewing machine I carefully feed the stack through, remembering to backstitch on both sides. I didn't do that on one of mine, and now every time I tear off a page I can see the stitches pulling out. I also have to do this very slowly, using the balance wheel on the side rather than the foot pedal, in order to help the needle through all the layers.
The awesome part of this whole endeavor is that since the needle punches through the papers to sew them, it creates a perforation that makes tearing a page out of your notebook SO EASY! This is one of my favourite little projects lately. And you could totally dress up this project any way you like. Right now I'm just doing it in a very utilitarian way, but you could use fancier papers, coloured thread, different sized pages... you are limited only by your imagination!

Last week I found myself with a stack of one-sided pieces of paper to put in the recycling after going through our gigantic and neglected mail pile. I also had been lamenting my lack of organization to keep up with my list habit. I love making lists for stuff (to-do, groceries, projects, whatever...) and I like to use scrap paper for them, but often my little scraps get lost in the vortex of our computer desk. I have in the past tried stapling scraps together, which is always slightly dissatisfying when you want to tear off a piece, and a paper clip might as well not even be there. But I do have a sewing machine...

These are ridiculously easy to make, and another total no-brainer, but I LOVE them. I love making my lists on them, I love tearing the pages off, I love knowing where my lists are now... They're great.
Just cut your scrap pages into the size note pad you want (I cut in 3 sideways, where the folds would be to put it in an envelope). I'm also pretty lax about the size of each page. You can be as tidy or untidy as you want. Then, using a wide straight stitch on my sewing machine I carefully feed the stack through, remembering to backstitch on both sides. I didn't do that on one of mine, and now every time I tear off a page I can see the stitches pulling out. I also have to do this very slowly, using the balance wheel on the side rather than the foot pedal, in order to help the needle through all the layers.
The awesome part of this whole endeavor is that since the needle punches through the papers to sew them, it creates a perforation that makes tearing a page out of your notebook SO EASY! This is one of my favourite little projects lately. And you could totally dress up this project any way you like. Right now I'm just doing it in a very utilitarian way, but you could use fancier papers, coloured thread, different sized pages... you are limited only by your imagination!
Wednesday, February 2, 2011
Made It: Sugar Body Sugaring
So the last time I tried this whole sugaring thing (a whole week ago), I wasn't completely satisfied. I went back to the drawing board (Internet), and got some new strategies.
This new batch I made with only sugar, lemon juice, and water. Here it is:
1) mix it up
2) microwave on high in a large bowl 30 seconds at a time stopping to stir until mixture reaches this amber colour and is about the thickness of honey


4) cool. it'll be pretty toffee-like (you could eat it now if you wanted! the lemon juice makes it taste a little weird though


5) take a scoop, smear it on your leg, and snap off, a la this video.
*this takes major practice to master because the paste will be more like taffy or something. have you ever tried to get something sticky off your fingers using your fingers but without getting it stuck to your fingers? yeah, this is how it turns out...

What I like about this method
- it doesn't use any strips so you're not limited by anything
- you can use the same tablespoon of paste over and over again and it's still effective
- the only ingredients are sugar and lemon juice, which is pretty thrifty!
- it seems to work just as well, if not better than the other sugaring I tried
- no granular bits
- there's kind of a knack to the snapping off and it feels like an art one might be proud to master
What I didn't like
- getting a snack for my son while having this gooey sticky all over my hands. you should have seen what I looked like taking that last picture. Yup, used my chin to press the button...
- my mixture was really thick, so it was pretty hard to spread. I might try making it a bit thinner next time
Monday, January 31, 2011
Week 5: Almost Emmeline Apron
(January 31, 2011)
This weekend we took a little trip to visit my parents. We thought it would be fun for Charlie to hang with his grandparents for a bit and for us to take the opportunity for a night out with free babysitting! An added bonus of this trip was a little project I had in mind that I was pretty sure I wouldn't be able to do by myself. My mom is crazy about projects. Sometimes when she's visiting us I make up a project just so she won't go stir crazy.
Confession time: I love aprons. I already have 3 cute ones in my regular rotation that I got from antique malls, but 2 of them are the half skirt kind, which don't protect my main spill area, and the other doesn't fit me right or something. Something about it just feels shlumpy, which is NOT how I want to feel while wearing an apron. I love the idea of being sassy in an apron. Some kind of juxtaposition between domestic and fantastic. So when I found this picture, I was smitten. I think this might be sort of a no-no, but I couldn't really justify spending $11.95 on a pattern for an apron that I don't really need. And I figured, "I could probably make that..." Well what I really thought was "I bet my mom could figure that out... and then I could probably make it"
So we teamed up, searched through her amazing fabric stash, selected some prints she didn't really need, and went to work!

Here's my mom, taking charge

This apron is perhaps not exactly like the emmeline apron, but it's close enough for me! Now I need to go put on my apron and make something. Thanks mom!

This weekend we took a little trip to visit my parents. We thought it would be fun for Charlie to hang with his grandparents for a bit and for us to take the opportunity for a night out with free babysitting! An added bonus of this trip was a little project I had in mind that I was pretty sure I wouldn't be able to do by myself. My mom is crazy about projects. Sometimes when she's visiting us I make up a project just so she won't go stir crazy.
Confession time: I love aprons. I already have 3 cute ones in my regular rotation that I got from antique malls, but 2 of them are the half skirt kind, which don't protect my main spill area, and the other doesn't fit me right or something. Something about it just feels shlumpy, which is NOT how I want to feel while wearing an apron. I love the idea of being sassy in an apron. Some kind of juxtaposition between domestic and fantastic. So when I found this picture, I was smitten. I think this might be sort of a no-no, but I couldn't really justify spending $11.95 on a pattern for an apron that I don't really need. And I figured, "I could probably make that..." Well what I really thought was "I bet my mom could figure that out... and then I could probably make it"
So we teamed up, searched through her amazing fabric stash, selected some prints she didn't really need, and went to work!

Here's my mom, taking charge
The pattern was pretty tricky, and by the end of Day 1 I was ready to give it up and sacrifice the cut fabrics to the quilt scrap bin, but my mom persevered (and ripped out the seams) and thought up a new plan for Day 2. Her direction worked like a charm and I merely did as I was told.


Friday, January 28, 2011
Made It: Body Sugaring
I wasn't really sure what to call this Made It. What I made was a thick, candy-like syrup from sugar, honey, and lemon juice that has the power to rip your hairs out by the roots.
A while back, when I had TV and watched a lot of it at home, there used to be this infomercial for a product called Nads (hilarious, right?) which was kind of like a home leg wax kit, but was made of sugar instead of wax. I recall thinking at the time, "I could probably make that..." but now with the miracle of the Internet, I can!
The recipe I used was sort of vague, and I feel like it should have been more specific regarding temperatures and such, since this is basically some kind of candy stage and it probably only works at a certain candy stage. (soft ball? hard crack? what?)
At any rate, here's what I used:


A while back, when I had TV and watched a lot of it at home, there used to be this infomercial for a product called Nads (hilarious, right?) which was kind of like a home leg wax kit, but was made of sugar instead of wax. I recall thinking at the time, "I could probably make that..." but now with the miracle of the Internet, I can!
The recipe I used was sort of vague, and I feel like it should have been more specific regarding temperatures and such, since this is basically some kind of candy stage and it probably only works at a certain candy stage. (soft ball? hard crack? what?)
At any rate, here's what I used:

Just mix it up and microwave in a fairly large container. I used a 2 cup pyrex measuring cup because it's going to bubble up like crazy. Here's where the instructions I had failed me. I think it probably should have had some water or something, because even though the stuff was boiling and liquidy and all, there remained some granulation in the sugar, even when I was applying it to my legs like half an hour later!

This is what my supplies looked like as I was about to begin. Yep, that's a great big plastic baby fork ("applicator"). And corn starch for dusting your skin with. I can't recall the reason for the corn starch and forgot to use it on my second leg and didn't notice any difference. So you probably don't really need it.

The Lowdown
While I was super excited for this project because a) I haven't removed hair by any means from my legs in several months and b) it is much more cost effective than paying someone to wax my legs and even buying those individually waxed strips, in the end I was slightly dissatisfied. I think it was a good start, but here's what I didn't like about it:
- Sugar that stayed granulated to the end. Rubbing paste with granulated sugar on your skin is not comfortable. I'm hoping to make another batch next time and get the consistency right
- Each fabric strip was basically only good for one pass. I only cut 6 strips so I fudged it and used each strip more, but I had to add more sugar each time, which made it sort of unwieldy and thick. And kinda grody.
- It wasn't quite as effective as my old pre-waxed strips
- I'm not sure if this is just because I'm not used to using a liquid wax formula, but I didn't really like the whole spreading aspect. And the long strings of stuff.
I didn't really like this recipe, but I've found an even BETTER method that I'm excited to try that does not even need fabric strips! I'll let you know when I do it, though it might be a bit of a wait. I have to wait for more hair to grow!
Thursday, January 20, 2011
Goals for Frugally Living Well
One of the things I'm learning through financial restriction is how much of a privilege good food is. By "good food" I mean food that is fresh, wholesome, and unprocessed. For a low income family, it is next to impossible to buy locally grown meat, artisan bread, locally roasted coffee, and farmers' market veggies. These are the things we are used to, but in these reduced circumstances, they're simply out of our reach. Of course I'd rather buy an organic free range chicken... Heck, even that "free from" packet of chicken thighs is looking good these days. But at over $2/kg more than the regular chicken thighs, it's a tough sell.
I suppose financial restriction really just forces you to choose which is more important to you. If I was stricter with myself, perhaps I would purchase that free range chicken instead, and only have chicken every other week.
At any rate, one of our big purchases used to be our bread selection. We are a major toast family, and plain old grocery store bread just ain't gonna cut it. (I can't decide if that's a pun or not...) As it turns out, making your own bread is much tastier AND more cost effective than buying the grocery store bread. Here is my list of things that I hope will help us to live within our budget AND live well:
1) Use everything you have. This means not letting anything go bad in the fridge, and no daily shopping trips!
2) Bake your own bread

3) Make as much as you can yourself. Future projects include mustard, salad dressing, ketchup, lotion, sunscreen, conditioner, soap, body butter, etc. This helps you to avoid weird ingredients and hopefully will also benefit the grocery bill. (Though some of the projects have a bit of a start-up cost for materials)

4) If you can't fit anything in your closet (dresser, piles on the bedroom floor, etc.) you don't need any more clothes.
5) Decide what you can and can't live without. One of the things that we don't cave on is peanut butter. Yet. But ordinary supermarket coffee will do for now. Besides, they don't have Transcend here.
That's it for now. I'll probably add to this list as I learn more about our limits and limitations!
I suppose financial restriction really just forces you to choose which is more important to you. If I was stricter with myself, perhaps I would purchase that free range chicken instead, and only have chicken every other week.
At any rate, one of our big purchases used to be our bread selection. We are a major toast family, and plain old grocery store bread just ain't gonna cut it. (I can't decide if that's a pun or not...) As it turns out, making your own bread is much tastier AND more cost effective than buying the grocery store bread. Here is my list of things that I hope will help us to live within our budget AND live well:
1) Use everything you have. This means not letting anything go bad in the fridge, and no daily shopping trips!
2) Bake your own bread

3) Make as much as you can yourself. Future projects include mustard, salad dressing, ketchup, lotion, sunscreen, conditioner, soap, body butter, etc. This helps you to avoid weird ingredients and hopefully will also benefit the grocery bill. (Though some of the projects have a bit of a start-up cost for materials)

4) If you can't fit anything in your closet (dresser, piles on the bedroom floor, etc.) you don't need any more clothes.
5) Decide what you can and can't live without. One of the things that we don't cave on is peanut butter. Yet. But ordinary supermarket coffee will do for now. Besides, they don't have Transcend here.
That's it for now. I'll probably add to this list as I learn more about our limits and limitations!
Wednesday, January 19, 2011
Week 3: Tea Cozy
(January 17, 2011)
 I've been a tea enthusiast for the last 11 years (ahh those dorm room tea parties... so nice.) but the whole time without a cozy. Whenever I went to buy one in a store I always stopped, thinking "I could probably make that" but never did. And now I have one! It's quite a bit taller than my teapot though, so I think it's probably more effective rolled up, as in the last pic.
cost breakdown: free! (Scraps again! My mom found me all these great little Japanese hand towels the last time we were there, and the liner is made from a linen skirt I cut up a while ago. The sad part is that all the towels are different, so there are no more in this awesome pattern. Both sides came from the same towel!)

cost breakdown: free! (Scraps again! My mom found me all these great little Japanese hand towels the last time we were there, and the liner is made from a linen skirt I cut up a while ago. The sad part is that all the towels are different, so there are no more in this awesome pattern. Both sides came from the same towel!)
Week 1 : Pincushion
(Monday, January 3, 2011)
I figured I'd start this whole thing off nice and easy with a project I first tried somewhere around grade 4. Nothing's really changed in this project since then, though I'd hope I have a bit better sense of which fabrics go well together. However, my fabric stash is nowhere near as extensive as my mother's, and those 4th grade pincushions are still looking great in her sewing room...

Anyway, here's my new pincushion. I needed this because I accidentally left my other one at a friend's place in Edmonton before we moved, and completely forgot about it in the stress of all the other moving stuff.
cost breakdown: free! (just some fabric & ribbon scraps, hot glue, stuffing, and a cat food can - clean of course!)
I figured I'd start this whole thing off nice and easy with a project I first tried somewhere around grade 4. Nothing's really changed in this project since then, though I'd hope I have a bit better sense of which fabrics go well together. However, my fabric stash is nowhere near as extensive as my mother's, and those 4th grade pincushions are still looking great in her sewing room...

Anyway, here's my new pincushion. I needed this because I accidentally left my other one at a friend's place in Edmonton before we moved, and completely forgot about it in the stress of all the other moving stuff.
cost breakdown: free! (just some fabric & ribbon scraps, hot glue, stuffing, and a cat food can - clean of course!)
Subscribe to:
Posts (Atom)