Showing posts with label made it. Show all posts

Sunday, March 24, 2013

Made It: Crayon Eggs


Can you guess what kind of Easter craft these might go into???  Oh right, I totally gave it away in the title...

Ever since I had gestational diabetes with my second baby, I've been a bit worried about my sugar intake, as well as my 3 year old's.  And there's nothing like a holiday to rake in the sugary treats!!  (I know it probably seems like this stance contradicts the last post, but those chocolates are actually very low in sugar!)

So I struggle to come up with an appealing Easter basket for my sweet boy that isn't just loaded with treats.  I'll probably put one or two in there, and I am quite sure he'll get his fill from relatives eager to give him good stuff, so you don't have to be worried that he's totally deprived.

Anyway!  Back to the craft.  I had been wanting to make this little cutie, but not entirely sure how.  Various websites advise either filling plastic egg halves with wax and sandwiching them together or using a certain jello egg mold.  I figured it would be next to impossible to find the mold (though it sounded much easier!) so I set out on a quest to my local thrift stores for old crayons and plastic eggs.  I did not find a single crayon in any of the 3 shops I checked, but I did find the egg mold!!!  UNBELIEVABLE!!!   Still had the tag on with instructions and everything.  So after first making my boy a few jello eggs...  I was ready to get started!

Step 1: peel and sort crayons


Step 2:  admire the rainbow
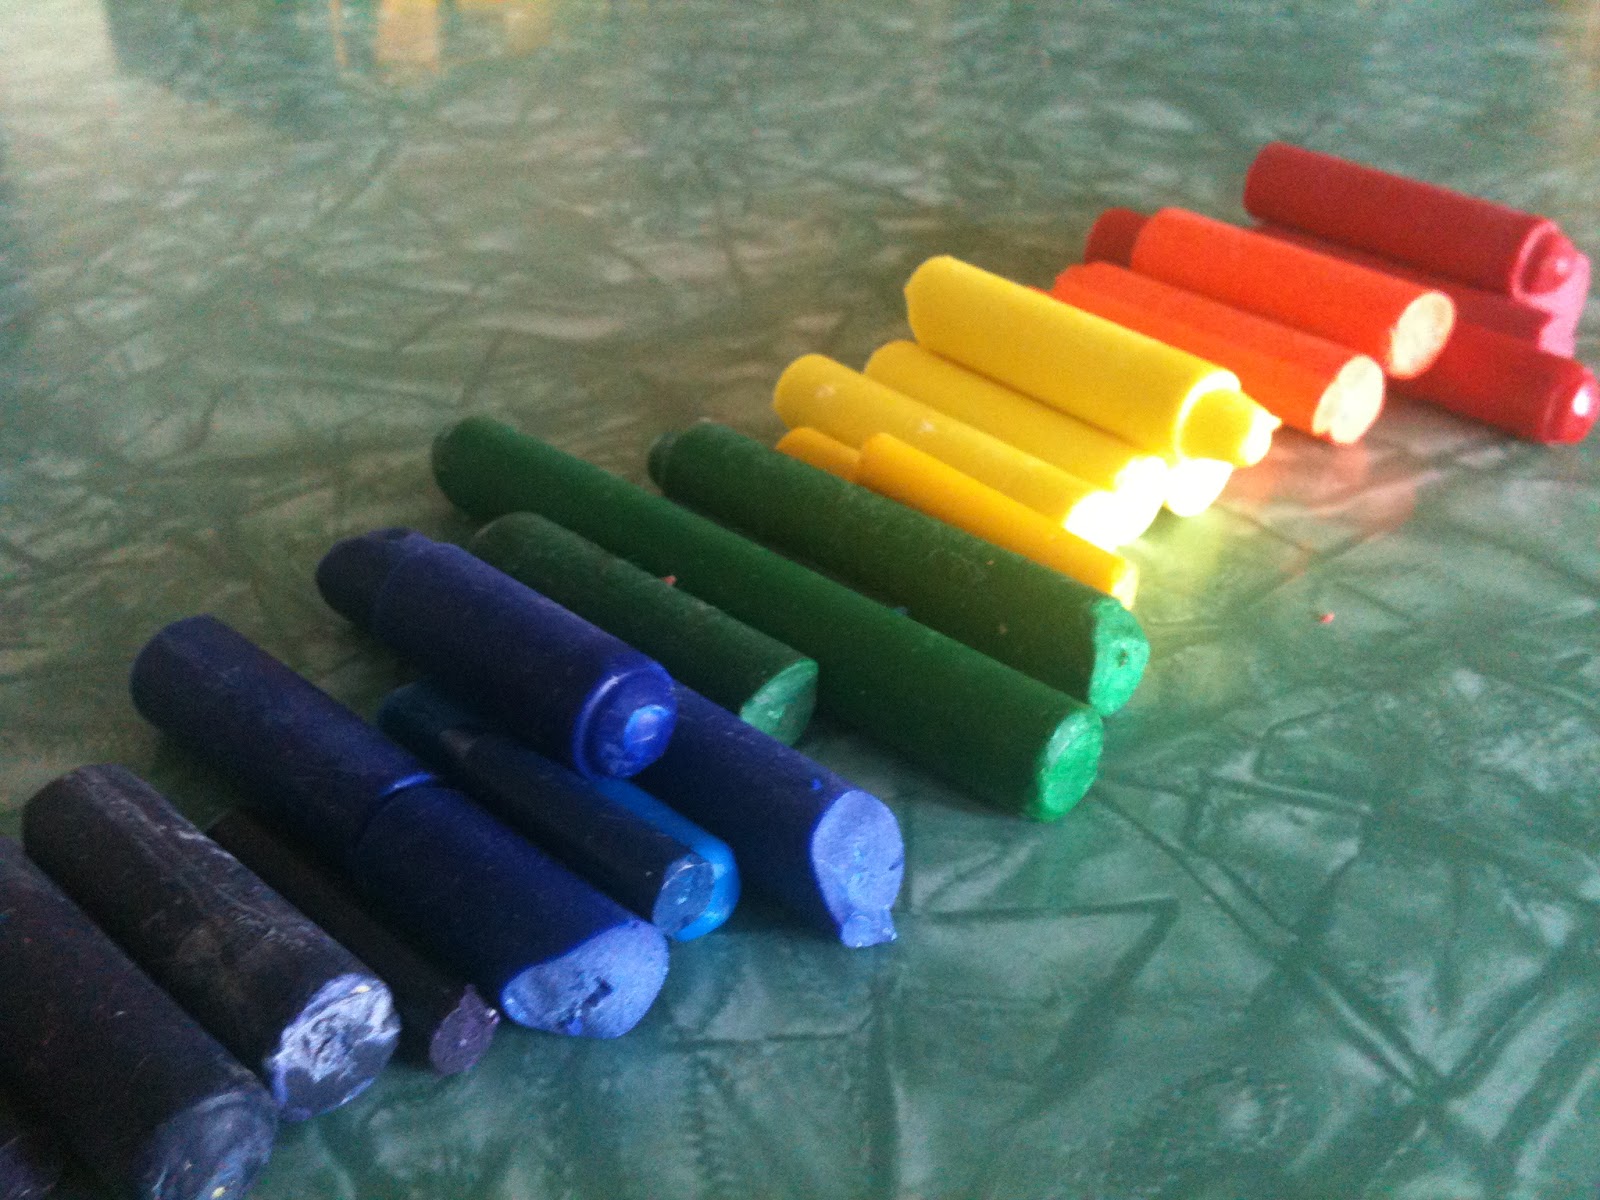

 Step 3: melt crayons.  I used clean tin cans in a water bath in my electric frying pan.  I don't know how other people do it, but I remember my mom using this method when she would make batiks when I was little.  Worked like a charm!  The only bad part was when I dropped a tiny piece of yellow crayon in the water bath and it started melting instantly.  I was worried I'd have to throw the frying pan away, but it looks as though I've managed to get all the wax off.  Phew!  You know how it is when your brother uses your mom's iron to wax his skis and then the iron forever after smells like ski wax?  Oh you don't?  Well, it's gross, and you don't want your pancakes smelling or tasting like melted crayon.  If that happens I suppose I'll have to toss it...


Step 4: gently and slowly pour melted crayon into molds.  I pinched each can into a sort of pouring spout to make this easier.  And it turns out that these molds are HUGE.  I thought for sure I had enough of each crayon to fill the molds, but none of them were much more than half full.  However, I think this is probably better.  A whole jumbo-sized crayon egg would be pretty tricky to draw with.


Step 5: pop those babies out and stick 'em in an egg carton.  Cute!  I think the reason some of them look a little funny is because of some residual oil left on them after I made the jello eggs.  I figured it would probably help make them come out easier, but it ended up almost preventing the wax from setting in those spots.


This is what the backs look like, which I think is almost as good.


Made It: The Best Chocolate Treat Ever

 Okay, so I totally fell off the wagon with the whole "one project per week for a year" idea.  Things happened.  I got a full-time teaching job and shortly after became pregnant, which means I then had a baby AS WELL AS a 3 year old.  Now my baby is 10 months old and my son will be 4 in a few months.  I don't necessarily have more time for projects, but I have all these projects burning up in my imagination.  I just gotta share 'em!!

Here's my current favourite:  Chocolate thin mints.  These babies have only 3 ingredients but are so delicious, impressive, and I like to think they are healthy.

1. Melt dark chocolate in the top of a double boiler.  I like to use the callebaut chunks, about 1-2 handfuls.

2. Spread over a wax paper lined cookie sheet.  I usually spray the sheet with water to keep the paper from moving around as I spread.  I also like the chocolate layers to be as thin as possible, which requires lots of spreading!  Refrigerate to set and cool for the next steps.


 3. Using the residual heat from the double boiler (but a different bowl), gently soften some coconut oil.  I used about 1 1/2 cups for this batch, but it all depends on the size of your cookie sheet and how thick you like the coconut oil layer.  I like it thick!  Add peppermint essential oil (or extract).  This batch turned out almost too peppermint-y, but usually about 20 drops is good.  When the coconut oil mixture is smooth and easy to stir, remove from water.


4. Pour over the chilled chocolate layer and quickly spread out until evenly spread and flat.  The coldness of the chocolate will harden the coconut oil layer, so work fast!  Refrigerate to set and cool.

5. Do another layer of chocolate for the top.  The tricky part is spreading it on the coconut oil layer without too much oil melting.  I still haven't figured this part out yet.  I think it's probably best to allow the chocolate to cool slightly after melting.

6. Refrigerate once more to set.  Cut into desired shapes.  If I'm feeling really lazy, I'll just break pieces off like chocolate bark and eat off the cookie sheet...


Wednesday, June 1, 2011

Made It (sort of): Wool Dryer Ball

I cannot BELIEVE I'm writing this now, as I have a ton of stuff to do tomorrow and should really go to bed, but I've been totally neglecting the blog, and and and and AND.

Several months ago I was given the suggestion to make some felted wool dryer balls.  I've never been one for fancy washing routine, and since I haven't ever used something like dryer sheets, I figured a dryer ball would be just as unnecessary.  Who cares about static?  However, I have since learned that dryer balls do not just reduce static in your laundry, they bounce around in there with your clothes and loosen everything up, helping to shorten the time needed to dry your clothes.

SO.  I decided to try to make one of my own.  I know that wool yarn can be expensive in stores - heck, even a nice poly blend can be expensive.  I sure as shootin' wasn't going to go to a fancy yarn store to get my supplies for this project.  So I combed the thrift shops to the best of my ability.  The funny thing about yarn though, is that people often call any kind of yarn "wool."  Even if it's polyester.  And since thrift store yarn is often wrapped and you can't feel it, it's hard to tell just exactly what it's made of.  However, I did remember that Dave's Christmas present was made of awfully scratchy cream coloured yarn - most likely wool - and I had quite a bit left over.

So I followed the instructions (basically just wind your wool into a tight ball about 1.5 " then wash inside a sock, then add more to be about 3 " in diameter, wash in a sock again until it's felted).

I generally don't wash in hot water and dry in the dryer, especially as the weather is getting nicer for outdoor drying, so I may have cut the last couple steps short.  When I washed my diapers this afternoon (a grey and rainy day) I rejoiced at the chance to use my wonderful new dryer ball!  But this is what came out of the washing machine:


I believe I uttered the words "laundry disaster."

Lesson learned.  Follow the instructions until the project is finished.  Luckily, this was only the outer layer, so I may still be able to salvage my dryer ball .

Monday, May 9, 2011

PERSONALIZED Notepads!

So remember these guys?  I wrote something about how you could dress it up or down however you like.  At the time, I couldn't really think of how a person might make it more interesting, short of using fancy scrapbook paper or something, but that takes a bit of the awesomeness out of the project, since you'd essentially be using new paper, rather than recycling or using up otherwise unusable paper.  

HOWEVER, I was trying to make some mother's day cards for our various moms around here, when I had a major brainwave.  

I printed out a few pics on my temperamental second-hand printer, and they were all pretty sub-par quality prints.  I wanted 3 copies of each, so when I printed them out, there were 3 pics down the left side of each page with about 6 inches of white space to the right.  Since so many of the pics were not really worthy of being put in a special mother's day card, I didn't know what to do with them all.  I think I had 5 pages in all.  


O ho!

All I did was cut the pages up between each picture, piled them all together, and sewed.  Voila!  A nice little writing pad for grandma with a cheeky boy on each page...  I wish I had come up with this before I sent the cards to the faraway grannies!  (I also wish that my printer was not so temperamental, or I would whip up a couple more and send them out!!)

Saturday, March 5, 2011

Made It: Toddler Yoga Pants

Cruising the Salvation Army this week, I found several sections of semi-awesome to awesome fabrics in their stash there.  I think I brought home about 6 or 7 rolls of varying lengths of fabric.One of the less fantastico, but more practical selections was a very lightweight heather grey jersey knit.  Perfect for some sweet yoga pants for a tiny boy!

I had this tutorial on the backburner, just waiting for when I had some appropriate fabric, and now is the time.  They really are as easy as she says they are.  The only possibly tricky part is measuring the waist of a child who has just recently learned how to suck his tummy in and doesn't like the cold measuring tape on his bare sensitive skin!

I think these pants had a total of 5 seams to stitch.  (I had a coordinating thread in my serger so I serged the edges, but it's probably not necessary.)

1) Making sure the stretch goes side-to-side instead of up and down, use a pair of pants that currently fits to trace a rough pattern of the legs.  EXCEPT for these pants, just do a straight wide leg.  Don't taper!


Like so:


2) Measure and cut waistband.  This will be a rectangle of 10 inches tall by (waist + 1 inch) wide.  The waist measurement is the stretchy way.  For Charlie this was 18 + 1 = 19 inches.  This was the tricky measuring, because the first rectangle I cut was only 16 inches and barely fit around his waist!


3) Fold in half, right sides together, and sew the waist band on the small (10 inch) side.


4) Right sides together, sew each leg from crotch down.

5) This part is also slightly tricky.  Put one leg inside out and one leg right side out.  Slip the right side out leg inside the inside out leg, and match up the "U" shapes.  I'm sorry if these instructions are confusing and mangled.  Pin, check Samster Mommy's instructions again to see if they're clearer, then sew.


6) Waistband time!  Fold the rectangular tube so that it is only 5 inches tall, right side out, and pin to the top of the pants (which you have also turned right side out), lining up the open unfolded end of the rectangle with the top opening of the pants.  Sew!


Honestly, I thought I would be able to explain it better than that.  But it's late and I'm feeling like my brain is a bit more mushy than usual.  Here are some pics of Charlie modeling with a frog book and a cookie cutter.


Something extra awesome about these pants: You could definitely make something VERY similar for yourself or another big person if you had more fabric and were so inclined.  Easy peasy!

Cost breakdown:  $2.49 for 1m of fabric (I suppose I'm assuming you have the machine to pull this off, and thread is negligible.  You could probably hand sew it if you had to...)

Wednesday, February 23, 2011

Made It:: deodorant

I've been wanting to try my own deodorant for a while, but I sort of had this little fantasy in my mind that maybe I don't need deodorant any more.  Like, maybe I magically stopped needing it.  However, the other night after a busy shift at work, I realized that I do, in fact, need deodorant.  I've been sporadically using just a little bit of baking soda rubbed on, but sometimes it just doesn't cut it.  

So here's what I used:


 1) Scoop 2 tablespoons of coconut oil into a bowl and microwave in small intervals just until it is spreadable.


2) Add  2 tablespoons each of cornstarch and baking soda.  Mix it up.  (The recipe I used suggested equal parts of the first 3 ingredients - I just figured that this would make a good amount for now, and 2 tablespoons is a nice round number)


3) Add 3-6 drops tea tree oil.  Apparently the tea tree has antiseptic and antifungal properties.  It also gives the deodorant a slightly minty smell.

4) Pour/scoop into a vessel of your choice.  This actually hardens quite a bit, so you could even put it into a regular deodorant container if you have one, or Dave was suggesting that I roll this into a ball and not have a container at all.  It's pretty tricky to get it out of this jar.  I had to scrape it out with a spoon and spread it on my skin with my fingertips like lotion. 


I should mention that this is not antiperspirant.  It doesn't stop you from sweating, just from being stinky while you sweat.  I can handle that.  No sweat...

Friday, February 18, 2011

Made It: Cardboard Stamps Pt. II

I made the first part of this post several weeks ago, but had to wait until after Valentine's Day to share the rest with you because the original shirt was a present for my Valentine!

Here's what it looked like as I got my supplies organized:


I did not design this shirt.  I saw a picture of one like it and thought it was so awesome and perfect for my Dave.  Romantical, isn't it?  <3


And here's my tiny boy in his Valentine's shirt:

Tuesday, February 15, 2011

Made It: Clif Bars

I didn't really make these.  ("What!" You exclaim, "This blog is a hack!  That's it I'm leaving...")  But don't run away just yet... please!

My dearest love David is a hardworkin' man who also chronically underestimates his lunchtime needs.  Sometimes he'll only pack something like two apples and a banana for his lunch.  For a full day.  Of pouring concrete.  I don't know if you know what pouring concrete is like, but it's basically just doing lunges and squats all day while pushing a giant weight around.  Shoveling heavy stuff.  Anyway, this is where the Clif Bars come in.  Those babies are expensive, yo.  So Dave decided he could probably make that.  And he did!


I don't know the exact recipe he used, and the silly boy has squirreled it away somewhere in a sneaky hidey hole so I can't share it with you at the moment.  But it's pretty easy!  Just a bunch of liquid type ingredients cooked in a pot (honey, PB, vanilla?) then mixed with the dry ingredients (oats, raisins, nuts?), pressed into a pan, and finito.   I think he also added protein powder to these to add to the lunch box punch, but that's not necessary.  The first batch he shaped them like regular Clif Bars, which is a lot more work, and I think these turned out better because they held together a bit more.  They are VERY sweet though.  Perhaps a bit less honey would work too!


Thursday, February 10, 2011

Made It: Notepad

Make it yourself!
 

Last week I found myself with a stack of one-sided pieces of paper to put in the recycling after going through our gigantic and neglected mail pile.  I also had been lamenting my lack of organization to keep up with my list habit.  I love making lists for stuff (to-do, groceries, projects, whatever...) and I like to use scrap paper for them, but often my little scraps get lost in the vortex of our computer desk.  I have in the past tried stapling scraps together, which is always slightly dissatisfying when you want to tear off a piece, and a paper clip might as well not even be there.  But I do have a sewing machine...


These are ridiculously easy to make, and another total no-brainer, but I LOVE them.  I love making my lists on them, I love tearing the pages off, I love knowing where my lists are now...  They're great.

Just cut your scrap pages into the size note pad you want (I cut in 3 sideways, where the folds would be to put it in an envelope).  I'm also pretty lax about the size of each page.  You can be as tidy or untidy as you want.  Then, using a wide straight stitch on my sewing machine I carefully feed the stack through, remembering to backstitch on both sides.  I didn't do that on one of mine, and now every time I tear off a page I can see the stitches pulling out.  I also have to do this very slowly, using the balance wheel on the side rather than the foot pedal, in order to help the needle through all the layers. 

The awesome part of this whole endeavor is that since the needle punches through the papers to sew them, it creates a perforation that makes tearing a page out of your notebook SO EASY!  This is one of my favourite little projects lately.  And you could totally dress up this project any way you like.  Right now I'm just doing it in a very utilitarian way, but you could use fancier papers, coloured thread, different sized pages... you are limited only by your imagination!

Made It: Breadcrumbs

I'm about to start a string of posts of things that are totally simple to make yourself.  So simple, in fact, that I almost feel silly posting about it.  Because they're that obvious.  Honestly, I don't think you are a moron.  I just thought I would share these awesome ideas with you!

Today's Made It is a total no-brainer.  We eat homemade bread here, which means that we slice it ourselves.  For some reason that is eluding me at the moment, the bread heels often don't get eaten.  They stay in the bread box until they get crusty and moldy and then we throw them out.  Stupid, right?  Until a little while ago, when Dave started collecting all of our unloved bread heels in a bag in the freezer.  Find a bread end?  Add it to the bag!  Until we had a decent sized bag full of various types of crusts.  (How many different words can I use for the same thing?)

Yesterday I wanted to make some oven fried chicken and needed breadcrumbs.  Project time!


I won't sport with your intelligence by telling you how to make breadcrumbs, but I will say that I recommend toasting them a bit.  Even after being in the freezer for several weeks (or months) the bread still held quite a bit of moisture.  After putting the pieces in the blender I toasted them in the oven for a while until they didn't have steam escaping them when I stirred them up.  That way I know they won't get soggy in their jar in the fridge!


This is just one of many small things you can do and make yourself around the house to save a few dollars.  An added bonus of this one is that I know exactly where everything came from.  It's like following the life cycle of my bread!  Hello little crumbs!  Thank you, you were delicious...

Sunday, February 6, 2011

Made It: Coconut Milk Frosting

I like how on the stand the cake looks like it's rising out of a lava rock island or something...

So as part of my goals for frugality this year, I'm trying to use everything we have.  That means that box of random non-perishables that Dave brought home after helping his friend move last month all got tucked away in our cupboards in preparation for using in our kitchen.  Because who are we to turn away something a friend has to offer?   And I must admit that some of these items have caused me a bit of consternation.  Here I am, trying to live a green lifestyle, a health conscious lifestyle, a frugal lifestyle, and a homemade lifestyle simultaneously, and what do I do with this box of Hamburger Helper?  Lots of times these different lifestyles will intersect and help each other out.  Use vinegar for everything - done.  Go no 'poo - done.  Make your own laundry soap - done.  But the handed down food items, they just don't jive with so many of my ideals.  Though if I discard them, then what do I become?  How does that make economic sense?

Simple.  Quit worrying and bake a cake!  (from a box!)


It's actually quite delicious, and almost even too easy of a project to get 19 month old Charlie involved in.  There were only 3 things for him to put in the mixer!  And the saving grace of this cake (aside from the awesome castle cake pan we got as a wedding gift) is the frosting.  And again, using everything we have...  I had about 3/4 c. of coconut milk in the fridge that wasn't getting used, so I decided to make coconut milk frosting.  It's pretty much a regular frosting recipe with coconut milk substituted for milk.  But it is so light and fluffy and delicious, it feels like a revelation!  Just your basic butter, icing sugar, and milk recipe with a touch of vanilla.  The other thing about using coconut milk is that with only a few tweaks you could make this into a vegan frosting.  Or a delicious coconut frosting.  The only thing is, the coconut milk doesn't add very much coconut flavour, so you might want to add some shredded coconut or coconut extract. 

Delish!

Wednesday, February 2, 2011

Made It: Cardboard Stamps


Just made this little cutie for my small boy.  It actually was inspired by another project, but that one is going to be a secret for now.  You can adapt it however you like!


Materials

cardboard
blank shirt
acrylic paint
fabric medium
paintbrush

I'm sure you could also use many different materials.  I'm just using the ones I had, though you definitely should use some type of fabric paint or fabric medium so that the image will stay on your clothes when you wash them.

It's pretty self explanatory I think... cut out your design, paint it, stamp it.  My first design I applied paint several times and carefully pressed down in the same spot, because I wanted better coverage.  This one I was cool with it being a bit more rustic looking.  I also found that the cardboard absorbed some of the paint, so a couple of layers worked better than just one.

PS- I also made a heart printed shirt, lest you may be thinking this boy is going to be too into scary things like skulls and zombies.  He's also into love!

Made It: Sugar Body Sugaring

So the last time I tried this whole sugaring thing (a whole week ago), I wasn't completely satisfied.  I went back to the drawing board (Internet), and got some new strategies.  

This new batch I made with only sugar, lemon juice, and water.  Here it is:

1) mix it up

2) microwave on high in a large bowl 30 seconds at a time stopping to stir until mixture reaches this amber colour and is about the thickness of honey


3) pour into your storage container


4) cool.  it'll be pretty toffee-like (you could eat it now if you wanted!  the lemon juice makes it taste a little weird though


5) take a scoop, smear it on your leg, and snap off, a la this video.

*this takes major practice to master because the paste will be more like taffy or something.  have you ever tried to get something sticky off your fingers using your fingers but without getting it stuck to your fingers?  yeah, this is how it turns out...


What I like about this method

- it doesn't use any strips so you're not limited by anything
- you can use the same tablespoon of paste over and over again and it's still effective
- the only ingredients are sugar and lemon juice, which is pretty thrifty!
- it seems to work just as well, if not better than the other sugaring I tried
- no granular bits
- there's kind of a knack to the snapping off and it feels like an art one might be proud to master

What I didn't like

- getting a snack for my son while having this gooey sticky all over my hands.  you should have seen what I looked like taking that last picture.  Yup, used my chin to press the button...
- my mixture was really thick, so it was pretty hard to spread.  I might try making it a bit thinner next time

Friday, January 28, 2011

Made It: Body Sugaring

I wasn't really sure what to call this Made It.  What I made was a thick, candy-like syrup from sugar, honey, and lemon juice that has the power to rip your hairs out by the roots. 

A while back, when I had TV and watched a lot of it at home, there used to be this infomercial for a product called Nads (hilarious, right?) which was kind of like a home leg wax kit, but was made of sugar instead of wax.  I recall thinking at the time, "I could probably make that..." but now with the miracle of the Internet, I can!

The recipe I used was sort of vague, and I feel like it should have been more specific regarding temperatures and such, since this is basically some kind of candy stage and it probably only works at a certain candy stage.  (soft ball?  hard crack?  what?)

At any rate, here's what I used:


Just mix it up and microwave in a fairly large container.  I used a 2 cup pyrex measuring cup because it's going to bubble up like crazy.  Here's where the instructions I had failed me.  I think it probably should have had some water or something, because even though the stuff was boiling and liquidy and all, there remained some granulation in the sugar, even when I was applying it to my legs like half an hour later!


This is what my supplies looked like as I was about to begin.  Yep, that's a great big plastic baby fork ("applicator").  And corn starch for dusting your skin with.  I can't recall the reason for the corn starch and forgot to use it on my second leg and didn't notice any difference.  So you probably don't really need it. 


 The Lowdown

While I was super excited for this project because a) I haven't removed hair by any means from my legs in several months and b) it is much more cost effective than paying someone to wax my legs and even buying those individually waxed strips, in the end I was slightly dissatisfied.  I think it was a good start, but here's what I didn't like about it:

- Sugar that stayed granulated to the end.  Rubbing paste with granulated sugar on your skin is not comfortable.  I'm hoping to make another batch next time and get the consistency right

- Each fabric strip was basically only good for one pass.  I only cut 6 strips so I fudged it and used each strip more, but I had to add more sugar each time, which made it sort of unwieldy and thick.  And kinda grody.

- It wasn't quite as effective as my old pre-waxed strips

- I'm not sure if this is just because I'm not used to using a liquid wax formula, but I didn't really like the whole spreading aspect.  And the long strings of stuff.

I didn't really like this recipe, but I've found an even BETTER method that I'm excited to try that does not even need fabric strips!  I'll let you know when I do it, though it might be a bit of a wait.  I have to wait for more hair to grow!